Routers
The process that directs data packets from a source network to a destination network is called routing. The device (physical or virtual) responsible for routing is the router.
Routers let you connect several networks.
The link between the router and a network is an interface, and each interface points to a specific subnet — not to the whole network. A network with three subnets needs three interfaces if all of them are to be routed. See Adding an interface.
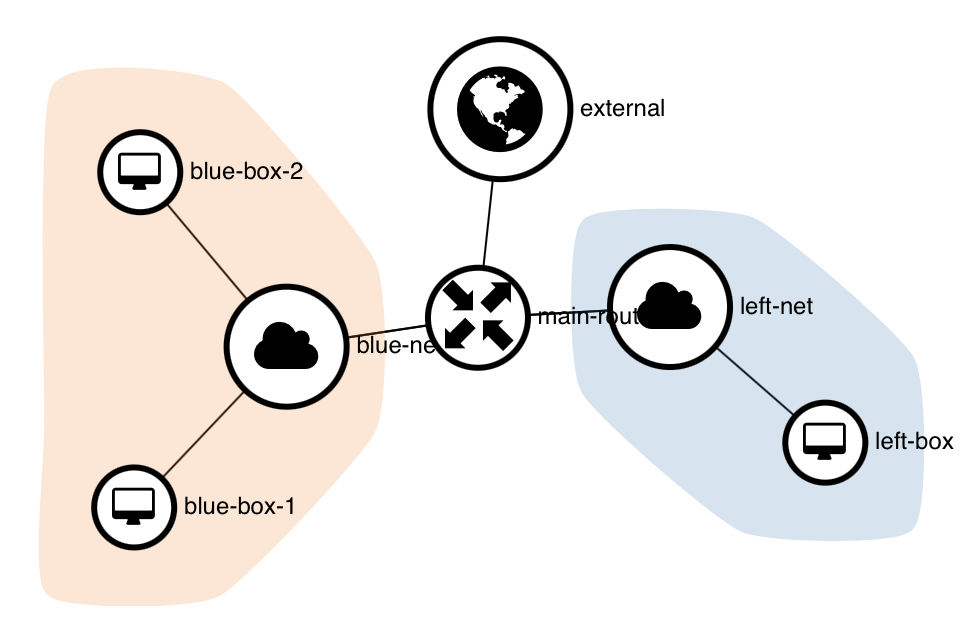
As you can see, a network created without a router — blue-net in the diagram below — is cut off from other networks and from external access. In the same diagram, left-net is connected to a router (main-router) that connects to the external public network.
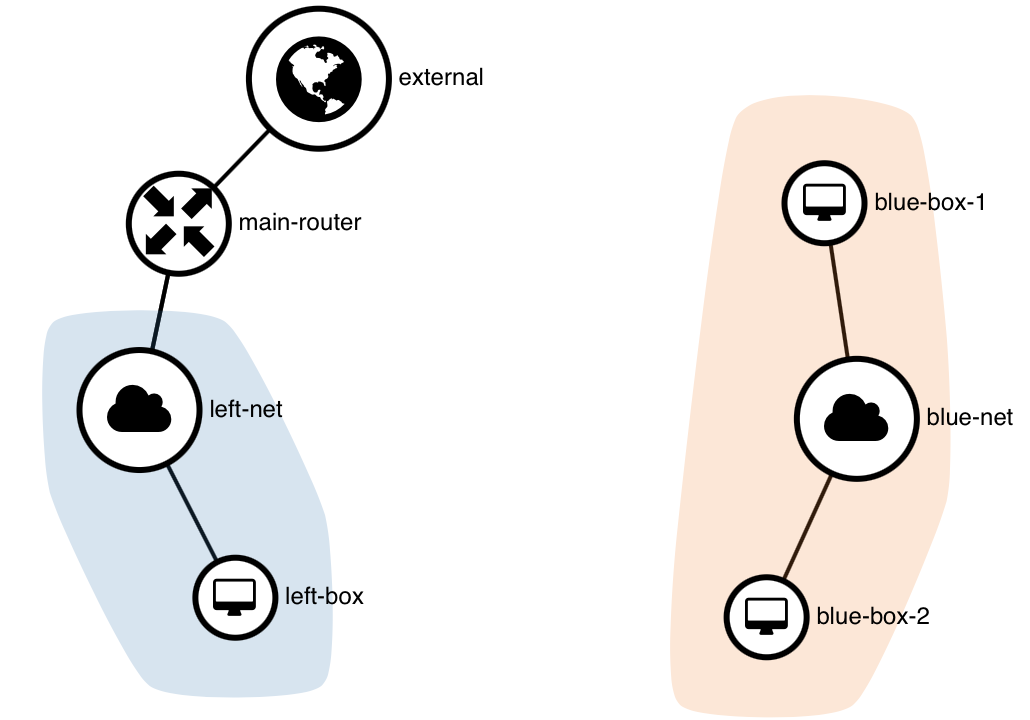
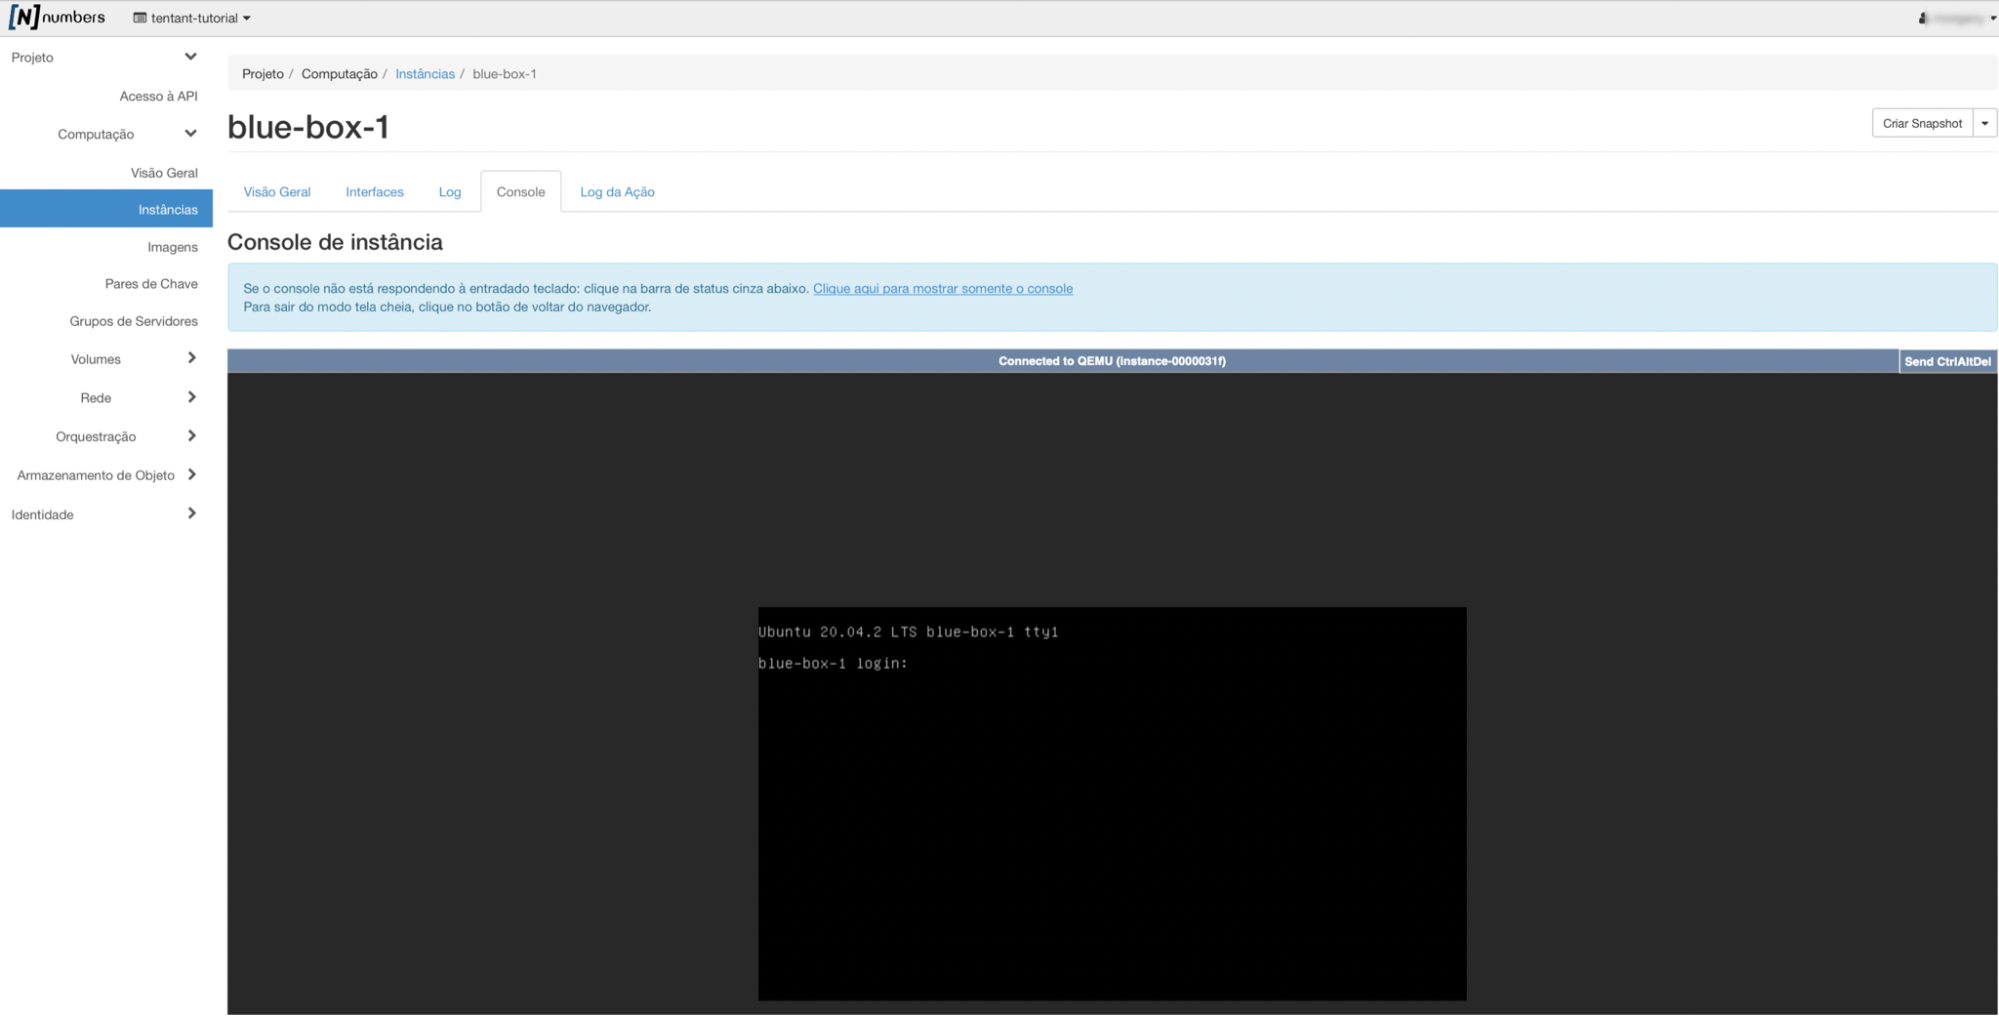
That means the only way to use the resources on compute instances blue-box-1 and blue-box-2 would be through the administrative console, as shown below:
Creating routers
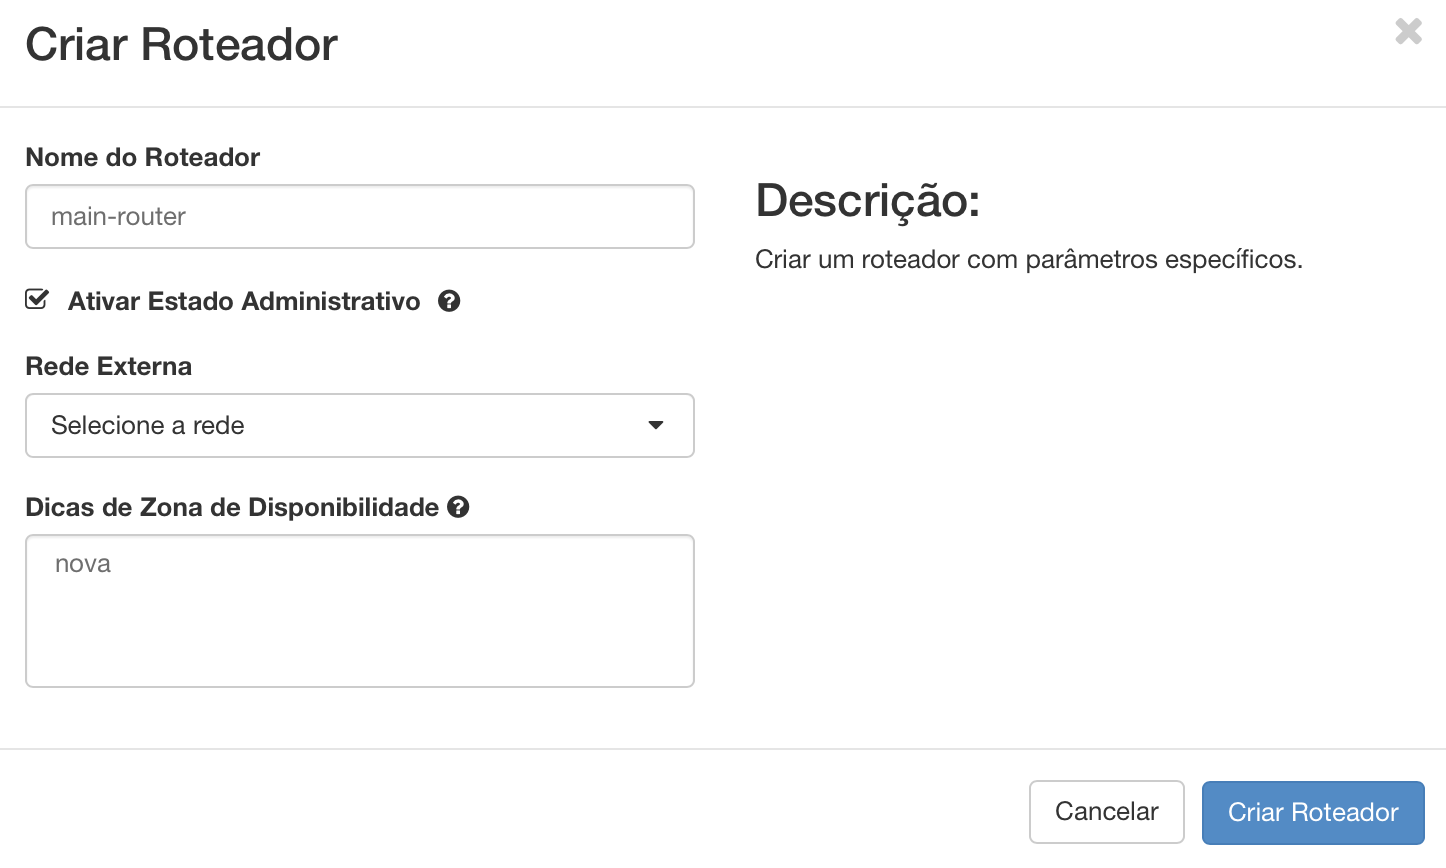
To create a router, go to Network, Routers, then click Create Router
All fields are optional.
-
If you do not give the router a name, the generated router ID appears in the Name column of the router list. You can set a name later.
-
If
Enable Admin Stateis unchecked, the router is not activated at creation. It can be enabled and disabled later. -
If you do not set an external network, the router stays disconnected from it. You can set it later through Set Gateway; and where it was set beforehand, you can also disconnect the router from the external network with
Clear Gateway. -
The
Availability Zone Hintscheckbox indicates where the router can be scheduled. Leaving it unset is the same as selecting every availability zone. At the moment, all NNumbers Cloud routers are scheduled in a single availability zone.
Enter the router name, select the external network, leave Enable Admin State checked, and click Create Router
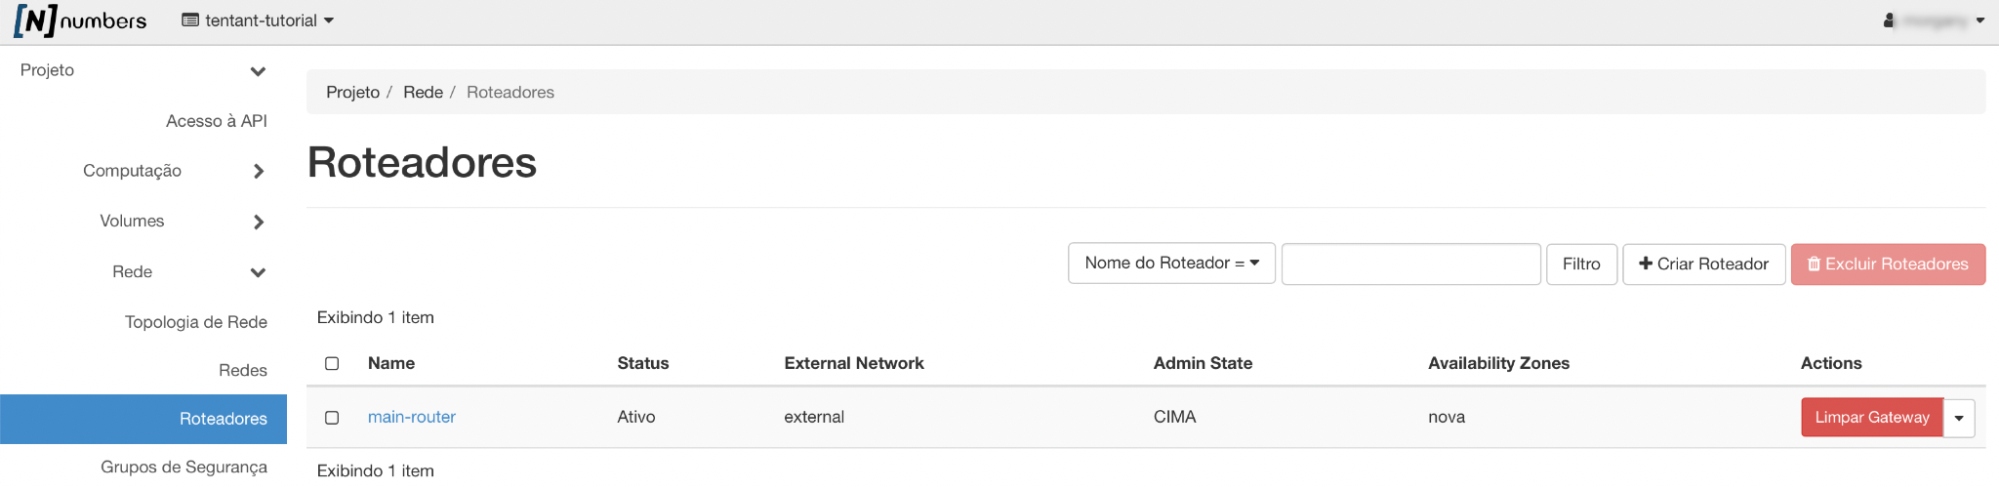
Adding an interface
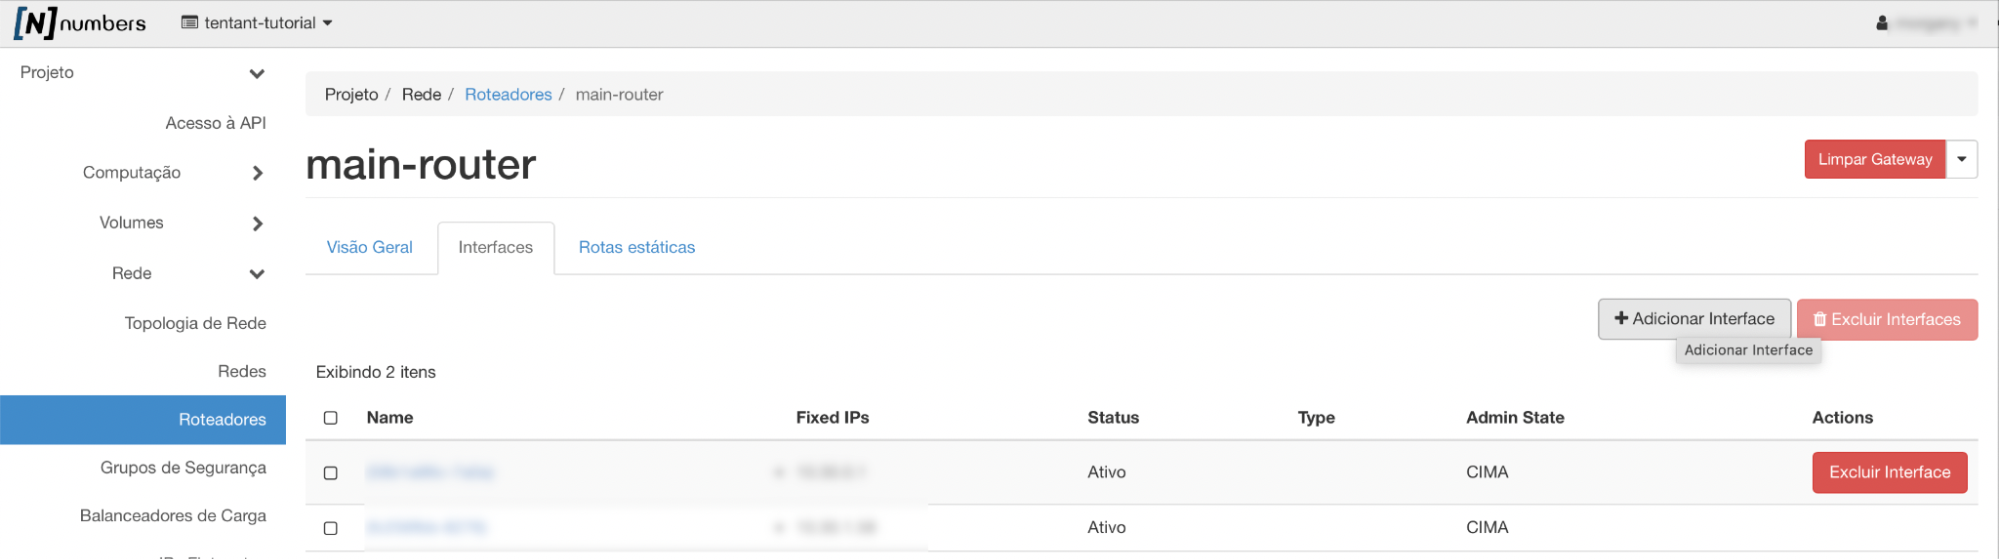
The next step is adding the router's interfaces. This is what integrates internal networks with the router. Click the link with the router's name (assuming you gave it one) under the Name column
Under the Interfaces tab, click Add Interface
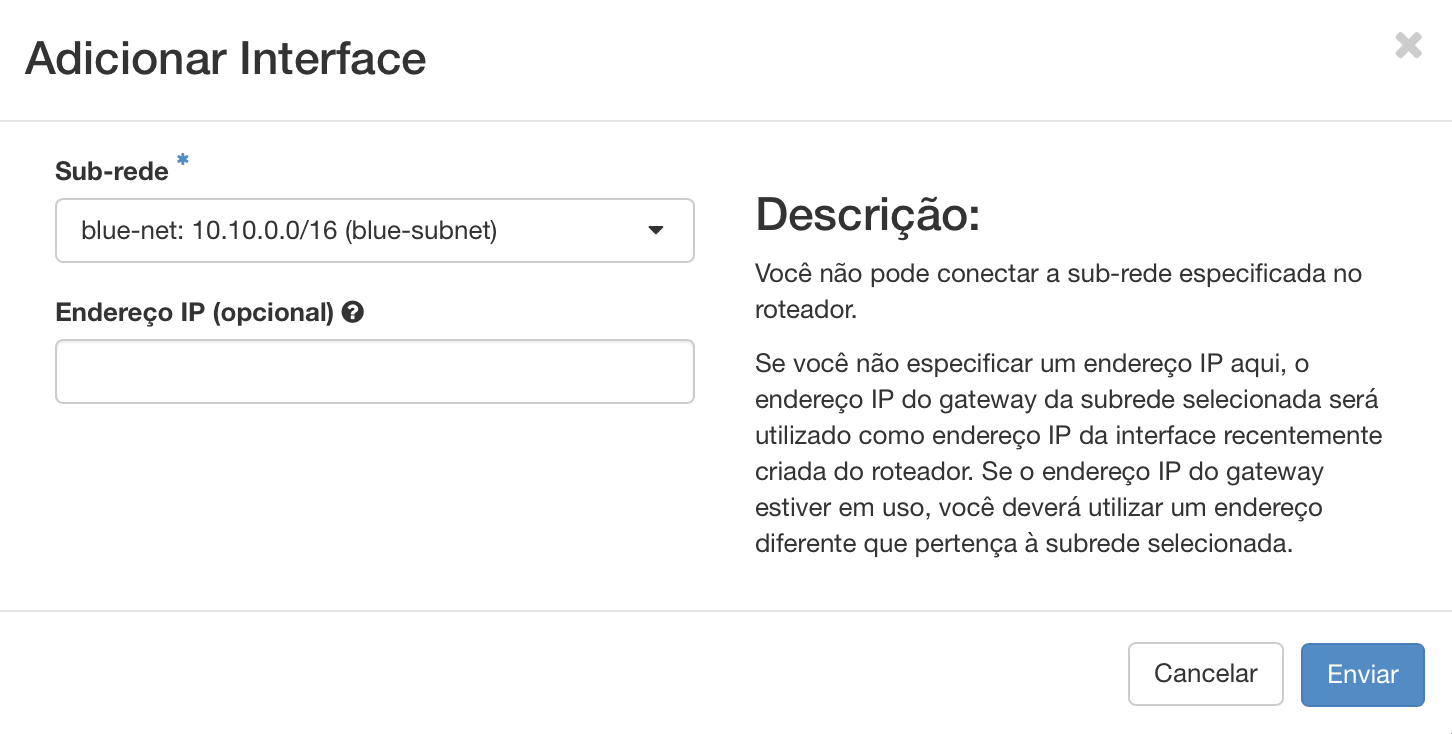
Choose the subnet you want to connect to — blue-net in the example — and optionally a gateway IP.
With that configured, the network graph should now show a link between blue-net and main-router.
Configuring static routes
Open the NNumbers Cloud console
In the left menu, click Network and then Routers:

On the next page, find the router in the list and click its name.
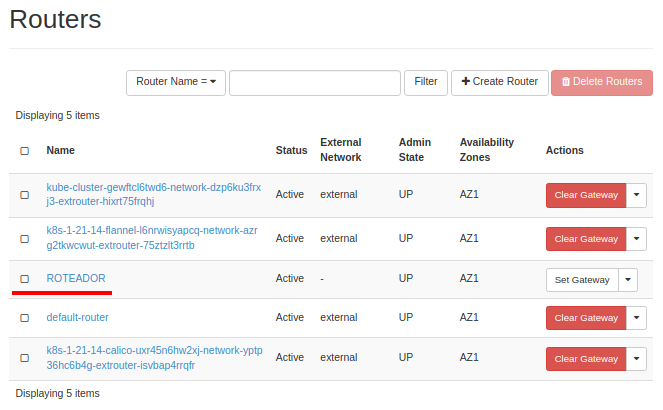
The router's details appear. In the list, click "Static Routes" (item 1).
You can add (item 2) or delete existing routes (item 3).
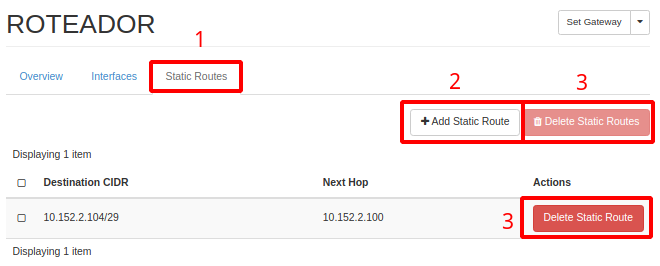
Let's create a static route — click + Add Static Route (item 2).
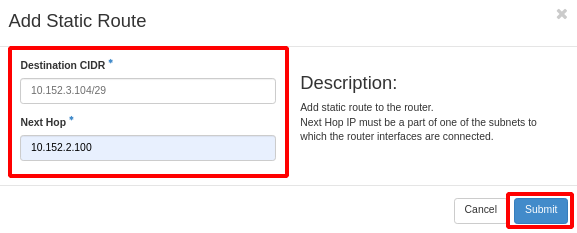
In the window that opens, fill in both fields. They have different formats — this is the most common mistake on this screen:
| Field | Format | What it is |
|---|---|---|
| Destination CIDR | Network in CIDR — 192.168.50.0/24 | The destination network you want to reach |
| Next Hop | IP address, no mask — 10.0.0.254 | The next hop: the reachable IP that knows how to get to that destination |
Writing the next hop in CIDR (10.0.0.254/32) is rejected: the field expects an address, not a range.
Full example. Network 10.0.0.0/24 is attached to this router. An appliance at 10.0.0.254, on the same network, has connectivity to the remote network 192.168.50.0/24:
  instance             router                appliance         remote network
  10.0.0.11    ──►    10.0.0.1      ──►     10.0.0.254   ──►   192.168.50.0/24
                   static route:
                   Destination CIDR = 192.168.50.0/24
                   Next Hop         = 10.0.0.254
The next hop must be on a subnet the router already reaches through an interface. A next hop outside those subnets is unreachable, and the route has no effect.
Once the fields are filled in, click Submit at the bottom
Verifying the route
The static route applies to the router. Confirm it from inside an instance on the network:
# The path to the remote network should leave through the subnet gateway
ip route get 192.168.50.10

# The full path, hop by hop
tracepath 192.168.50.10
A Network is unreachable means the next hop is unreachable or the route is missing. Hops that stop at the gateway mean the next hop does not know how to reach the destination — the problem is on the other side.
Instances do not get this route automatically: they send traffic to the subnet gateway, and it is the router that applies the route. If you need the instance itself to have a different route, use the subnet's host routes (see Networks) and renew DHCP on the instance — on Linux, sudo dhclient -r && sudo dhclient, or by restarting the instance.
Removing the route
Under Static Routes, use the delete button on the row (item 3). Removal is immediate and traffic goes back to the default route. Verify with ip route get again.
When two routes cover the same destination, the more specific one wins (/24 beats /16). A 0.0.0.0/0 route added here redirects all outbound traffic from the network and can cut off the instances' external access. See rollback before creating one.
Restarting a router
If maintenance, a security procedure, or anything else requires stopping and then restarting the router, you can do it by opening the router, editing it, and setting Admin State to disabled.
You can edit it from the menu below, on the router's row:

Restarting the router drops every external connection to the public IP(s) of your virtual private network for the duration of the process.
Next steps
Was this page helpful?
Report a problem on this pageDo not send passwords, keys, tokens, or customer data.